A garbage disposal is one of the most convenient appliances in a modern kitchen, quietly handling food scraps that would otherwise clog drains, attract pests, or create unpleasant odors. But like any appliance with a motor and mechanical components, it can occasionally stop working. One of the most common issues homeowners face is a garbage disposal that suddenly won’t turn on, hums without grinding, or shuts off mid-use.
In many cases, this doesn’t mean the disposal is broken beyond repair. Instead, it has likely tripped its internal safety mechanism. When this happens, the unit needs to be reset before it can operate again. Resetting a garbage disposal is a simple process, but doing it safely is essential to avoid injury, electrical hazards, or further damage to the unit.
This guide walks you through everything you need to know about resetting a garbage disposal safely, including why it happens, how to do it step-by-step, what to check before and after resetting, and when it’s time to call a professional. Whether you’re dealing with a completely silent unit or one that hums but won’t spin, understanding the reset process can save you time, money, and frustration.
Key Takeaways
- A garbage disposal often stops working due to overload, jams, or overheating—not permanent damage.
- The reset button is typically located on the bottom of the unit and acts as a built-in circuit breaker.
- Always turn off power before attempting inspection or manual resets for safety.
- If the disposal continues to trip repeatedly, there may be a deeper mechanical or electrical issue.
- Preventive care, such as avoiding hard objects and overloading, helps reduce reset frequency.
- Persistent problems may require professional repair or replacement.
Safety Precautions Before Resetting a Garbage Disposal
Before attempting to reset a garbage disposal, prioritizing safety is essential. Although the process itself is relatively simple, the area beneath a kitchen sink contains a combination of electrical connections, plumbing lines, and sharp internal components. These elements create potential hazards if handled without proper caution. Taking a few extra minutes to prepare the workspace can prevent accidents and ensure the reset procedure goes smoothly.
Disconnect Electrical Power Completely
The first and most important precaution is to make sure the unit is fully disconnected from electricity. There are two reliable ways to do this depending on your setup.
If your disposal is plugged into an outlet under the sink, unplug it directly. This provides a clear and immediate break from the power source. If the unit is hardwired or not easily accessible, switch off the corresponding circuit breaker in your electrical panel that controls the kitchen disposal or outlet.
It is important not to rely solely on the wall switch, as wiring configurations can vary and accidental activation may still occur. Confirming a complete power shutdown eliminates the risk of the motor starting unexpectedly while you are inspecting or adjusting components.
Never Insert Hands Into the Grinding Chamber
Even when the unit is off, the internal grinding elements remain sharp and capable of causing injury. In addition, some components may still move slightly if residual energy is released or if the system is accidentally reactivated.
For this reason, hands should never be placed inside the disposal opening. If you need to check for obstructions, always use safe tools such as tongs, pliers, or wooden utensils. These allow you to remove debris or test movement without direct contact with the internal mechanism.
This precaution is especially important when dealing with jammed items like utensils or hard food waste that may be lodged tightly inside the chamber.
Inspect for Moisture or Leaks
Water and electricity are a dangerous combination, and the area under the sink often includes both plumbing connections and electrical wiring. Before proceeding with any reset, take a moment to check for signs of leakage around the disposal unit, drain pipes, or nearby fittings.
Even small drips can create unsafe conditions if they come into contact with electrical components. If moisture is present, it should be addressed and dried before continuing. This step not only improves safety but also helps prevent long-term damage to surrounding cabinet materials and wiring.
Improve Visibility in Tight Spaces
The underside of a kitchen sink is typically dim, enclosed, and difficult to navigate. Proper lighting is essential to ensure you can clearly see what you are doing.
Using a flashlight or headlamp allows you to locate the reset switch, identify potential blockages, and inspect connections more accurately. Good visibility reduces the chance of missing important details, such as a tripped button or hidden debris inside the disposal opening.
Clear sightlines also help prevent accidental contact with plumbing fittings or sharp edges while working in a confined space.
Keep the Workspace Dry and Organized
A clean and dry environment is another key safety factor. If water has pooled beneath the sink or splashed during previous use, it should be wiped away before beginning the reset process.
Moisture increases the risk of slipping, electrical hazards, and difficulty handling tools. In addition, clutter under the sink can make it harder to access the disposal unit safely.
Organizing the area ensures that you have enough room to work comfortably and reduces the likelihood of accidental damage to pipes or electrical cords while reaching for the reset button.
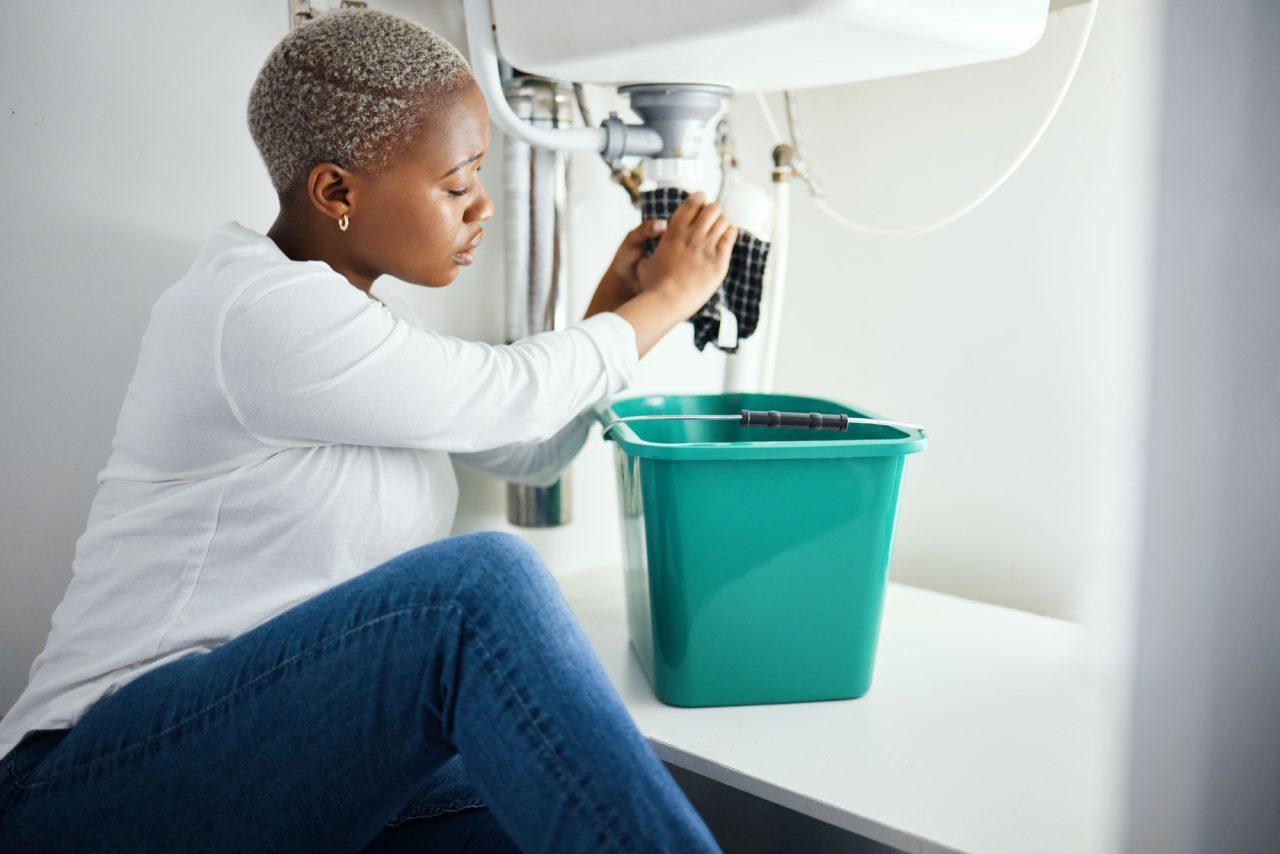
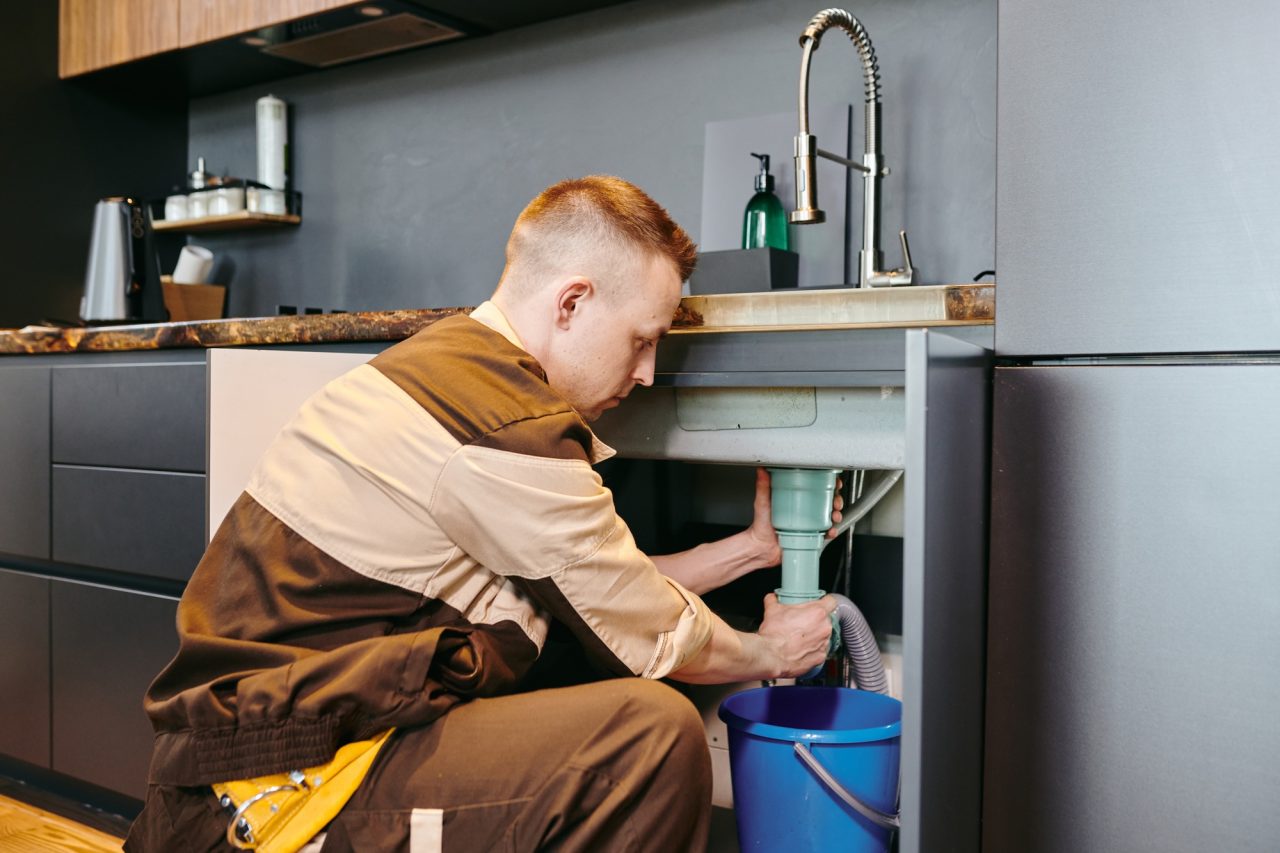
Step-by-Step Guide: How to Reset a Garbage Disposal Safely
Resetting a garbage disposal is usually a quick fix, but doing it correctly matters. A rushed or careless approach can worsen an existing jam, damage the motor, or create a safety hazard under the sink. The goal is not just to restart the unit, but to make sure it is safe and ready to operate again without immediately tripping a second time.
Turn Off the Power
Start by completely cutting power to the disposal. This can be done either by unplugging the unit under the sink or switching off the dedicated circuit breaker in your electrical panel. Do not rely on the wall switch alone, since wiring issues or accidental activation can still occur. Confirming zero power flow ensures that the impellers cannot suddenly activate while you are inspecting the unit.
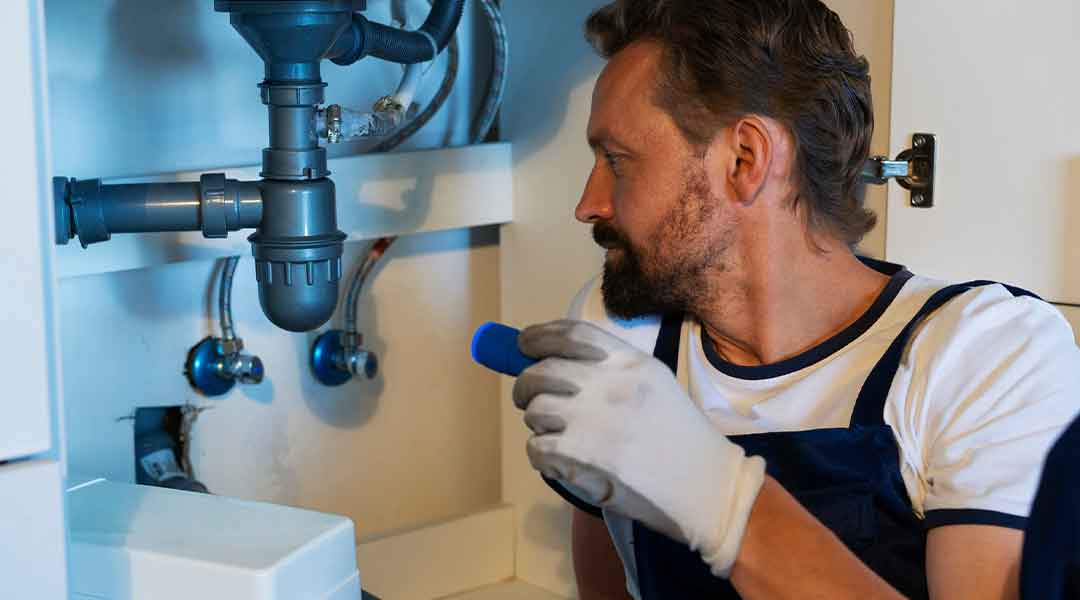
Find the Reset Button
Next, locate the reset switch, which is typically positioned on the underside of the disposal housing. It is often small, round, and colored red or black. In some cases, it may sit slightly recessed, so a flashlight is helpful for visibility.
This component works as a built-in overload protector. When the motor becomes too hot or overloaded, the button “pops out” to interrupt the electrical circuit. That pop-out position is a clear sign the unit has shut itself down for protection.
Inspect for Blockages
Before pressing anything, check the grinding chamber carefully. Use a flashlight to look inside the sink opening. If you suspect an obstruction, do not use your hands. Instead, use tongs, pliers, or another non-metal tool to safely remove debris.
Common culprits include small utensils, fruit pits, bones, or fibrous food scraps that can wrap around the internal components. If the flywheel or impellers feel stuck, gently test movement using the handle of a wooden spoon. If resistance is strong, a hidden jam may still be present. Clearing this first is essential because resetting without removing the blockage will only cause the system to shut down again.
Press the Reset Switch
Once you are confident the chamber is clear, press the reset button firmly. You should feel a small click as it returns to its normal position. That click signals that the internal breaker has been re-engaged and the unit is ready to receive power again. Avoid repeatedly pressing it, as doing so does not improve performance and may indicate a deeper issue if the disposal continues to shut off.
Restore Electrical Power
After resetting, reconnect the power supply. Plug the unit back in if it was unplugged, or switch the circuit breaker back on. Make sure your hands are dry and the surrounding area is free of water before restoring electricity.
Run a Controlled Test
Turn on cold running water before activating the disposal. Then switch it on and listen carefully. A properly functioning unit should produce a steady grinding sound without humming, rattling, or sudden shutdowns. The water helps carry ground particles through the drain while preventing overheating.
Observe Short-Term Performance
Allow the disposal to run for 10–15 seconds. During this time, watch for vibration, unusual noise, or automatic shutoff. Stable operation during this short test usually confirms the reset was successful. If problems reappear immediately, it may indicate a lingering obstruction or mechanical fault that requires further inspection.
Following these steps carefully ensures that the reset process is not only effective but also safe, reducing the risk of repeat issues and helping extend the life of the appliance.

What to Do If the Reset Doesn’t Work
Sometimes pressing the reset button does not solve the problem. This usually indicates a deeper issue.
Check for a Persistent Jam
If the disposal hums but doesn’t spin, the impellers may still be blocked. In this case, you may need to manually free the flywheel using an Allen wrench (if your model supports it).
Inspect the Circuit Breaker
A tripped household breaker may prevent power from reaching the unit. Check your electrical panel and reset any tripped switches.
Look for Burnt Smells
A burning smell may indicate motor damage. If this occurs, stop using the unit immediately.
Consider Electrical Faults
Loose wiring, a damaged switch, or internal failure may prevent the reset from working.
How to Prevent Future Garbage Disposal Resets
Reducing how often a garbage disposal needs to be reset comes down to consistent, mindful use rather than reactive fixes. Most shutdowns happen when the system is pushed beyond its limits—whether from excessive food waste, unsuitable materials, or heat buildup inside the motor. By adjusting everyday kitchen habits, you can keep the unit running more smoothly and minimize unexpected interruptions.
A key part of prevention is controlling the type of waste that enters the chamber. Disposals are not designed to handle everything that goes down the sink. Tough items such as bones, fruit pits, and shell fragments can place unnecessary stress on the grinding components. Likewise, fibrous scraps like corn husks, celery strands, and onion layers tend to wrap around internal parts instead of breaking down cleanly. When these materials accumulate, they increase resistance and often lead to shutdowns that require a reset.
Another important factor is portion size. Overloading the system is one of the quickest ways to trigger a safety cut-off. When too much food enters at once, the motor struggles to process the load efficiently, which generates heat and strain. Feeding waste in smaller amounts allows the blades to work at a steady pace, reducing the risk of sudden stoppages. Running cold water at the same time also helps move material through the drain more evenly.
Water usage itself plays a major role in keeping the unit stable. A steady flow of cold water supports proper grinding and flushing, preventing grease and soft residues from sticking to internal surfaces. Warm water, on the other hand, can soften fats and oils, allowing them to coat the chamber and gradually slow down performance. Over time, this buildup can contribute to clogging and overheating, both of which increase the likelihood of resets.
Routine maintenance also helps keep the system operating efficiently. Simple cleaning methods, such as grinding ice cubes or using mild dish soap, can help loosen debris and reduce residue inside the chamber. This light maintenance supports smoother movement of internal parts and reduces friction that may otherwise strain the motor during use.
Equally important is regular operation. Allowing the disposal to sit unused for long periods can lead to stiffness in moving components or minor buildup that affects performance. Running the unit occasionally, even without food waste, helps keep internal parts active and prevents stagnation.
By combining these habits—careful food selection, gradual feeding, proper water flow, simple cleaning, and consistent use—you significantly reduce the conditions that cause overload or shutdowns. Over time, this not only lowers the need for resets but also extends the overall lifespan of the appliance, making it more reliable for everyday kitchen use.
Be Selective With What Goes Into the Disposal
One of the most effective ways to reduce reset issues is being mindful about what you put into the system. Garbage disposals are designed for soft food residue, not tough or fibrous materials that resist grinding.
Hard items like chicken bones, fruit pits, and shell fragments can damage internal components or lock the impellers in place. Meanwhile, stringy foods such as onion skins, celery strands, and corn husks tend to wrap around moving parts instead of breaking down cleanly. Over time, these materials increase strain on the motor and often lead to shutdowns that require resetting.
A good rule of thumb is to treat the disposal as a “final rinse” for small leftover scraps rather than a primary food waste processor.
Introduce Waste in Small Amounts
Overloading is one of the most common reasons a disposal trips its internal protection system. When too much food enters the chamber at once, the motor has to work harder than it was designed for, which increases heat and resistance.
Instead of dumping large portions of scraps in one go, allow food waste to enter gradually. Feed it in small batches while the water is running so the blades can process each portion efficiently. This steady flow reduces pressure on the system and helps prevent sudden stoppages.
Spacing out usage also allows the motor to maintain a more consistent operating temperature, reducing the likelihood of thermal shutdowns.
Always Run Cold Water During Operation
Water plays a critical role in how efficiently a garbage disposal functions. Cold water, in particular, helps solidify fats and oils so they can be chopped into small particles rather than coating the inside of the chamber.
If warm or hot water is used, grease can soften and spread along internal surfaces, eventually forming sticky buildup that slows down the impellers. This buildup increases friction and can contribute to clogs that require manual clearing and resetting.
Running a steady stream of cold water before, during, and after operation ensures waste is properly flushed through the plumbing system and minimizes residue inside the unit.
Maintain a Simple Cleaning Routine
Even though a garbage disposal handles cleaning duties for food waste, it still benefits from occasional maintenance. Over time, tiny particles can accumulate on the grinding components and interior walls, reducing efficiency.
A simple cleaning method involves using ice cubes to help dislodge buildup inside the chamber. As the ice is ground, it scrapes against the internal surfaces, helping remove debris. Adding a small amount of dish soap afterward can help break down grease and leave the system fresher.
This routine does not require special tools and can be done periodically to keep the disposal operating more smoothly. Cleaner internal components reduce strain on the motor, which lowers the chances of unexpected shutdowns.
Keep the Unit Running Regularly
Surprisingly, one of the most overlooked maintenance habits is simply using the disposal consistently. When left unused for long periods, moisture can contribute to minor corrosion, and internal parts may stiffen slightly.
Running the unit occasionally—even when there is no food waste—helps keep the components active and prevents stagnation. A short cycle with cold water can help maintain smooth movement of the impellers and reduce the risk of mechanical sticking.
Regular operation also ensures that any minor buildup is flushed out before it becomes a larger problem.
Final Thought on Preventive Care
Reducing the need for resets is less about reacting to problems and more about preventing them through everyday habits. By avoiding unsuitable food waste, feeding scraps gradually, using proper water flow, and maintaining a simple cleaning routine, you significantly reduce stress on the system.
A well-maintained garbage disposal is far less likely to overheat, jam, or shut down unexpectedly—saving you time, effort, and unnecessary troubleshooting in the long run.
Conclusion
Resetting a garbage disposal is one of the simplest maintenance tasks a homeowner can perform, but it plays an important role in keeping your kitchen running smoothly. Most of the time, a tripped reset button is simply the result of overload, a small jam, or overheating—not a major failure.
By following proper safety steps, checking for obstructions, and pressing the reset button correctly, you can often restore your disposal in minutes. However, the real key to long-term performance is prevention. Avoiding improper food waste, using water correctly, and not overloading the unit will significantly reduce the chances of future issues.
If resetting becomes a frequent necessity, it may be a sign that your disposal is struggling and needs inspection or replacement. Knowing when to take that next step can save you from bigger plumbing problems down the line.
With proper care and safe handling, your garbage disposal can remain a reliable kitchen helper for years to come.
Frequently Asked Questions
Where is the reset button on a garbage disposal?
It is usually located on the bottom of the unit, often in red or black color.
Why does my garbage disposal keep tripping the reset button?
This is commonly caused by jams, overload, overheating, or electrical issues.
Can I reset the disposal without turning off power?
No. You should always turn off power before attempting any maintenance.
What if the reset button keeps popping out?
This usually indicates a persistent jam or motor issue that needs inspection.
How long should I wait before resetting a hot disposal?
Wait about 10–15 minutes to allow the motor to cool down.
Is it safe to use a stuck disposal?
No. Never force it to run if it is jammed or not functioning properly.
When should I replace my garbage disposal instead of resetting it?
If it frequently trips, makes unusual noises, or fails to restart, replacement may be necessary.
Hard Water, Mineral Buildup & Pipe Corrosion: What Santa Rosa Homeowners Should Know
Hard water can quietly damage a plumbing system over time. Mineral deposits from calcium and magnesium gradually build up inside pipes, fixtures, and appliances, reducing water flow, lowering efficiency, and increasing the risk of corrosion. Left unchecked, this buildup can lead to costly repairs, failing water heaters, and premature pipe replacement. Yorkshire Plumbing helps homeowners in Santa Rosa identify and manage hard water problems before they cause serious plumbing damage.
In many Sonoma County homes, mineral-rich water slowly leaves deposits inside plumbing lines. These deposits narrow pipes, clog fixtures, and place extra strain on water heaters and appliances. Warning signs may include reduced water pressure, white residue on faucets, longer heating times from water heaters, or discolored water coming from taps. Over time, mineral buildup can also contribute to pipe corrosion, weakening plumbing lines and increasing the likelihood of leaks.
Our team uses advanced diagnostic tools to inspect plumbing systems thoroughly, even when pipes run underground or behind walls. By identifying mineral buildup and early corrosion, we can recommend practical solutions that protect the system and extend the life of pipes, fixtures, and water-using appliances. Clear explanations and straightforward options help homeowners understand what is happening and how to prevent further damage.
No guesswork. No unnecessary upsells. Just honest information and reliable plumbing solutions designed to protect your home’s plumbing system.
With nearly a decade of experience serving Sonoma County, this family-owned company has built a reputation for careful workmanship, honest service, and dependable results. Yorkshire Plumbing does more than repair pipes. We help homeowners understand how hard water affects plumbing systems and provide solutions that reduce mineral buildup and prevent corrosion.
If you’re concerned about hard water, mineral buildup, or pipe corrosion affecting your plumbing system, contact Yorkshire Plumbing today for a professional evaluation and practical guidance.
Disclaimer
The information provided on this website is for general informational and educational purposes only and is not intended as professional plumbing or construction advice. You should consult with a licensed plumber or qualified contractor for guidance specific to your home or situation. Do not rely solely on the content of this site to make decisions about plumbing repairs, installations, or maintenance. While we strive to keep the information current and accurate, it may not reflect the most recent industry standards or code requirements. Yorkshire Plumbing & Drain Services disclaims all liability for any actions taken or not taken based on the content of this site, to the fullest extent permitted by law.